https://www.artsy.net/article/artsy-editorial-artist-america-first-signature-art-form?utm_medium=email&utm_source=14195574-newsletter-editorial-daily-08-17-18&utm_campaign=editorial&utm_content=st-S
Art
The Artist Who Gave America Its First Signature Art Form
Early 19th-century America was a place of growing affluence. As wealth from agriculture and industry accumulated, New York’s moneyed classes hungered for cultural clout to add a luster of civility to the rugged face of the young republic. And as the urbanization of New York City intensified, city dwellers yearned for the picturesque. An answer to their longings would come with the arrival of
, a largely self-taught British expat who migrated to America in 1818 at the age of 17. Through his epic, romantic landscapes, Cole would provide the nation with a contemporary and complex art form to call its own.
, a largely self-taught British expat who migrated to America in 1818 at the age of 17. Through his epic, romantic landscapes, Cole would provide the nation with a contemporary and complex art form to call its own.
Long recognized as America’s first major landscape artist and the inadvertent founder of the
, Cole developed a new approach to the traditional subject that would resonate with a distinctly American audience. He journeyed through the Catskill and Adirondack Mountains, finding evidence of the country’s spectacular and sublime scenery—dramatic storm clouds and waterfalls; verdant yet shadowy forests—while borrowing bits and pieces from his European and British forebears. Bathed in golden sunlight and made majestic through a rich palette of greens, blues, and browns, the American landscape became a legitimate and cherished subject in Cole’s hands.
, Cole developed a new approach to the traditional subject that would resonate with a distinctly American audience. He journeyed through the Catskill and Adirondack Mountains, finding evidence of the country’s spectacular and sublime scenery—dramatic storm clouds and waterfalls; verdant yet shadowy forests—while borrowing bits and pieces from his European and British forebears. Bathed in golden sunlight and made majestic through a rich palette of greens, blues, and browns, the American landscape became a legitimate and cherished subject in Cole’s hands.
While he romanticized the northeastern American wilderness, often eliding signs of industry, commerce, and tourism, Cole’s motivations were never aligned with the Hudson River School’s intent to foster national pride or promote Manifest Destiny. Rather, he was a fierce opponent of the feverish industrial and economic expansion that marked President Andrew Jackson’s administration, and he did not hesitate to make his anxieties known. For Cole, the wilderness was there not to be conquered, but to be revered, and the Jacksonian impulse to expand westward signaled an uncivilized lack of restraint.
Who was Thomas Cole?
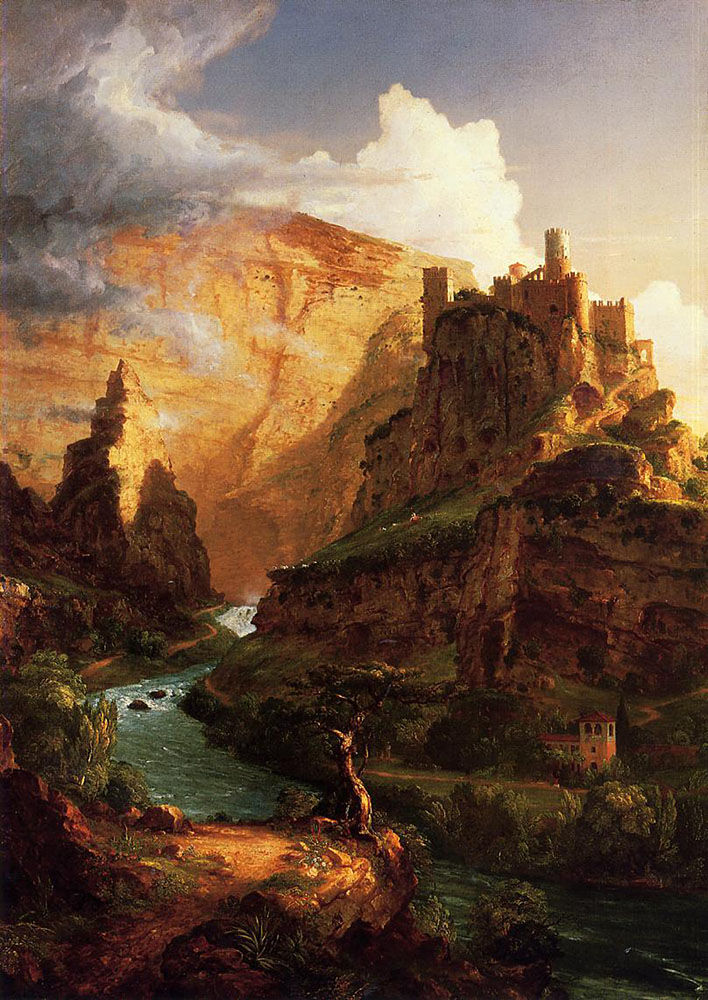
Thomas Cole, Valley of the Vaucluse. 1841. Photo via Wikimedia Commons.
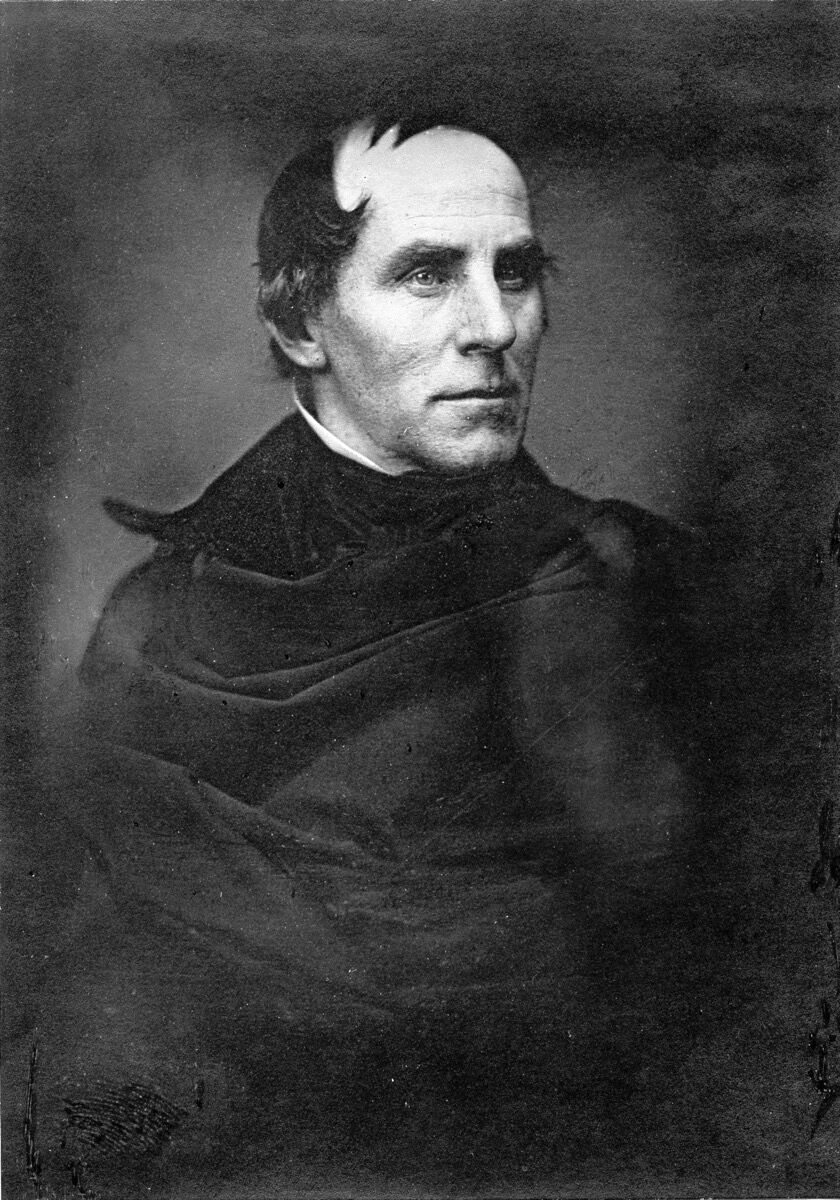
Portrait of Thomas Cole, 1845. Photo via Wikimedia Commons.
New York’s small 19th-century art world first laid eyes on Cole’s work in 1825, and the young artist was an instant hit. As legend has it,
, an accomplished painter of Revolutionary War-era episodes and president of the American Academy of Fine Art in New York, remarked of the 24-year-old Cole: “I am delighted and at the same time mortified. This youth has done at once, and without instruction, what I cannot do after 50 years’ practice.”
, an accomplished painter of Revolutionary War-era episodes and president of the American Academy of Fine Art in New York, remarked of the 24-year-old Cole: “I am delighted and at the same time mortified. This youth has done at once, and without instruction, what I cannot do after 50 years’ practice.”
Born in Bolton-le-Moors in Lancashire, England, in 1801—the height of the industrial revolution—Cole was never formally educated in art, but he supplemented his family’s income as a teenager by assisting engravers, first carving blocks in a calico textile factory, and then later in an engraver’s shop in Liverpool. Cole would have encountered the coal-choked skies, violent labor disputes, and burning factories of industrial northern England, environments that likely shaped his reverent attitude toward nature.
In 1818, Cole’s father took his family to America in search of brighter, more lucrative horizons. A skilled draughtsman, Cole had been sketching the vegetation of the New World when he met an itinerant portrait painter in Ohio, who would prove to be one of the more significant drifters in art history. He showed Cole some tricks of the trade and gave him a book on oil painting, which the boy studied assiduously.
After chasing his own portrait commissions, Cole made his way from Philadelphia to New York City in 1825. His lucky break came when a carving and gilding shop on Bleecker Street hung three of his landscapes in the window, and the works caught the eye of a passerby, George Bruen, who would become Cole’s first patron. Soon after, Bruen sent Cole up the Hudson in search of new material, and the landscapes that followed—renderings of Kaaterskill Falls and the Catskill Mountains, and the strangely bleak yet optimistic Lake with Dead Trees (Catskill) (1825)—brought the young artist a succession of generous patrons, including Trumbull, the artists William Dunlap and
, and Philip Hone, a notable diarist and one-term mayor of New York.
, and Philip Hone, a notable diarist and one-term mayor of New York.
What inspired him?
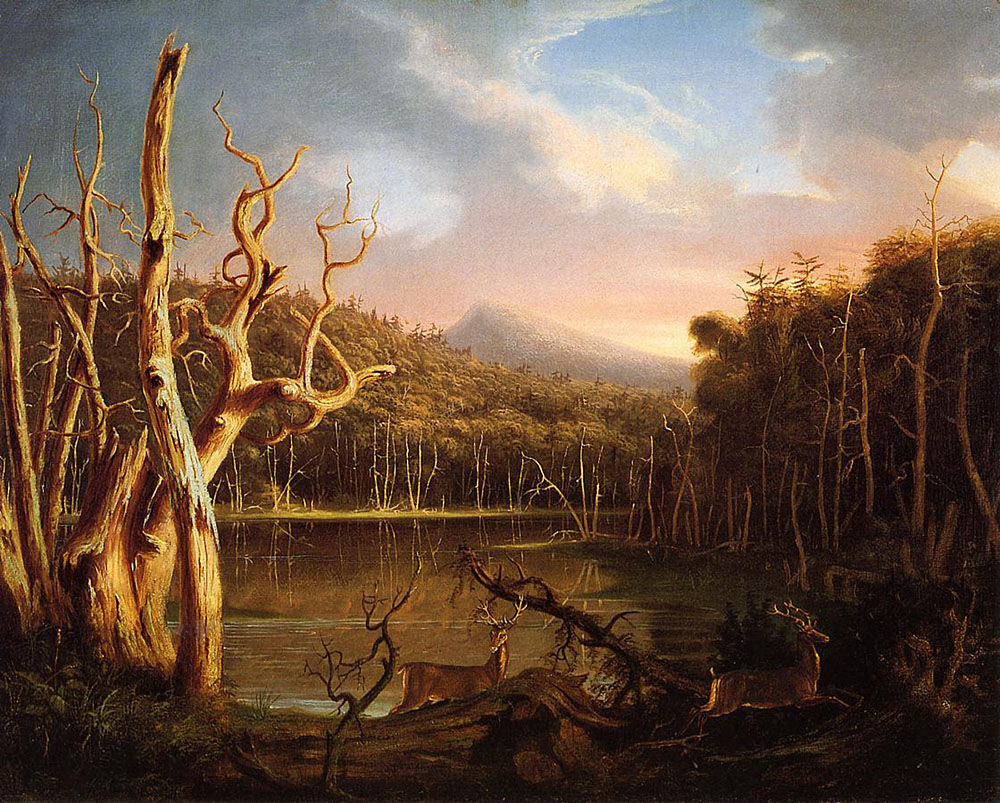
Thomas Cole, Lake with Dead Trees (Catskill), 1825.
Curious about the developing art scene across the pond and eager to study the masters, Cole set off on a European tour in 1829 and spent the next three years largely in London and Italy. He tested the market for his work in London, which turned out to be tepid, but he picked up all kinds of lasting impressions on his journey, from Rome’s classical ruins to the idyllic 17th-century landscapes of
and the
of his revered British landscape contemporaries,
and
.
and the
of his revered British landscape contemporaries,
and
.
When Cole finally returned to New York in 1832, the city’s fixation on commerce and materialism had only intensified—a disappointment for the artist. He moved to the town of Catskill, New York, only to watch the wilderness diminish. If forests weren’t vanishing to the lumber industry or being replaced with roads and railways, they were leveled for tanneries, factories, and farms.
In his 1836 manifesto-like “Essay on American Scenery,” Cole sounded the alarm. “I cannot but express my sorrow that the beauty of such landscapes are quickly passing away—the ravages of the axe are daily increasing—the most noble scenes are made desolate, and oftentimes with a wantonness and barbarism scarcely credible in a civilized nation,” he wrote. “The wayside is becoming shadeless, and another generation will behold spots, now rife with beauty, desecrated by what is called improvement; which, as yet, generally destroys Nature’s beauty without substituting that of Art.”
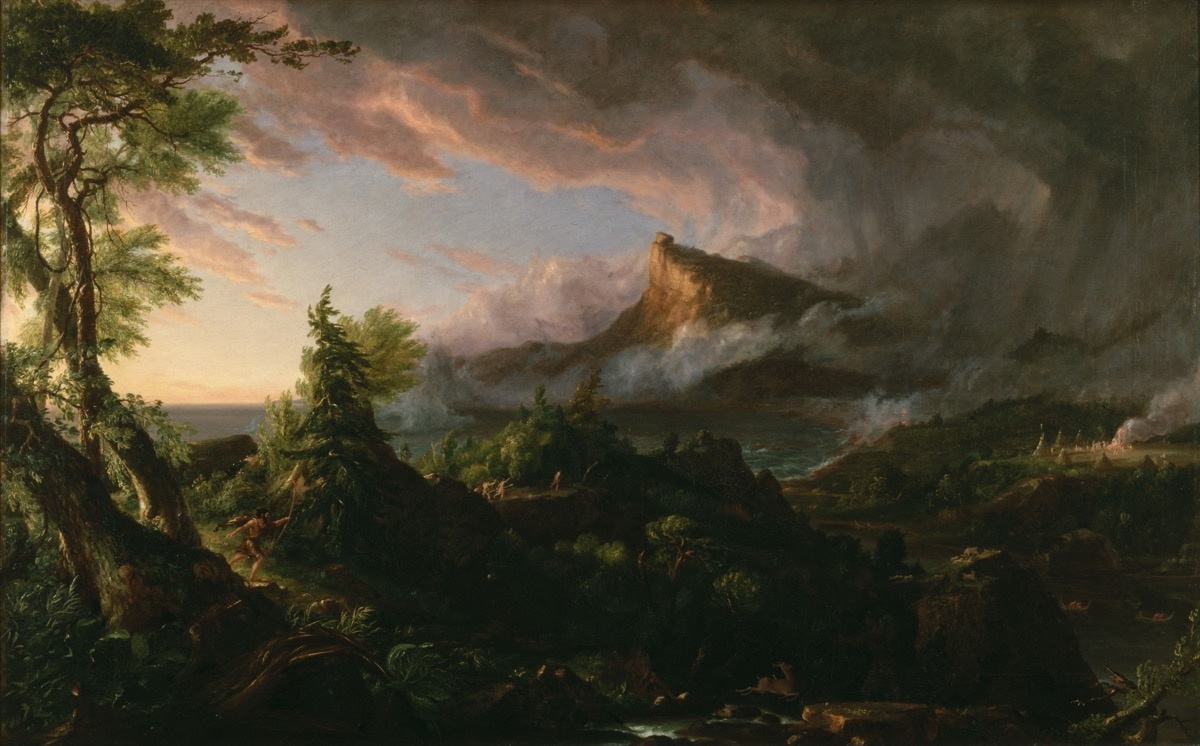
Cole’s anxieties about America’s future culminated visually in “The Course of Empire” (1833–36), a dramatic allegorical series clearly indebted to the romantic landscapes, history paintings, and classical ruins he saw in Europe. With obvious allusions to the fall of the Roman Empire, the five landscapes, which he exhibited privately in New York in 1836, detail the pessimistic rise and fall of an unnamed civilization, from The Savage State through the Arcadian or Pastoral State; Consummation of Empire; Destruction; and Desolation.
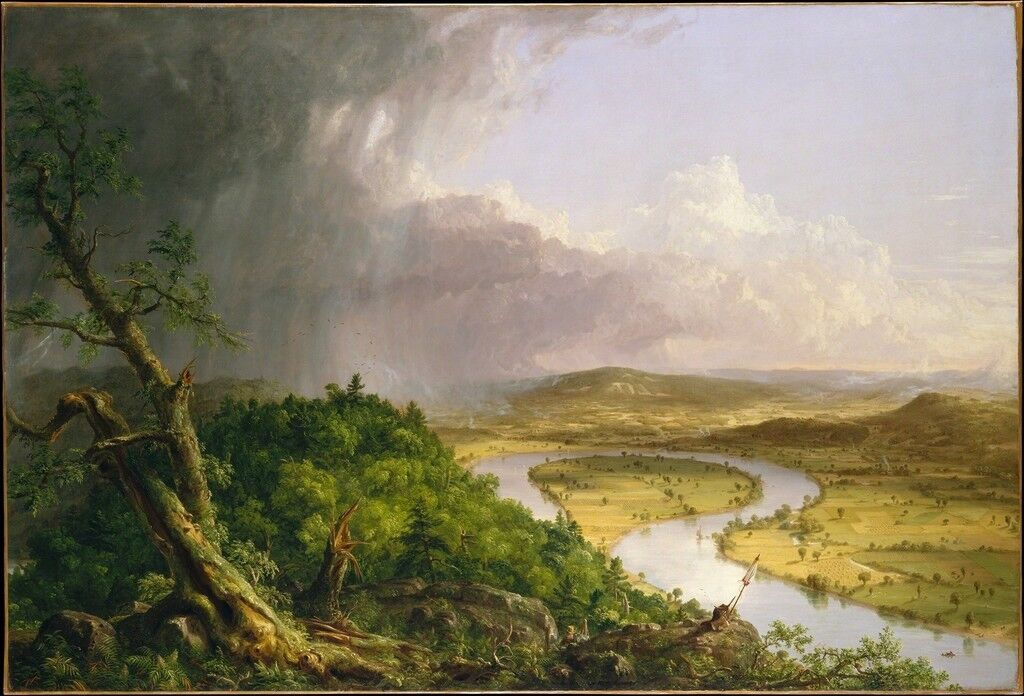
That same year, 1836, he painted his most famous picture, View from Mount Holyoke, Northampton, Massachusetts, after a Thunderstorm—The Oxbow(1836). The vivid panoramic scene posits two opposing forces against one another: the verdant, wild woods versus miles of denuded farmland. At the center is the painter with his easel, situated on the side of the woods, but observing the farmland below.
“He was consistent in his celebration of the aesthetic and spiritual power of the natural wilderness; his fascination with the life cycle of civilizations was informed by deep anxieties about the ecological danger presented by the rise of modern industry, the growth of cities, and the worship of money,” writes Tim Barringer, Yale art history professor and co-curator of the exhibition “Thomas Cole’s Journey: Atlantic Crossings,” which originated at New York’s Metropolitan Museum of Art in early 2018 and has since traveled to London’s National Gallery.
When Cole died unexpectedly in 1848 at the age of 47, after a short bout with lung troubles, a generation of younger artists, who would become the Hudson River School, were quick to adapt his panoramic, romantic visions in the name of American pride.
Why does his work matter?
The Course of Empire
View Slideshow
5 Images
Cole gave America its first signature style: an image of nature that was idealized, yet anchored in the geography and soil of the New World, unlike the mythological and historical scenes of the grand European tradition. “It was forward-looking,” says Jason Rosenfeld, chair of Marymount Manhattan’s art history department (and editor-at-large of The Brooklyn Rail), who co-curated a show of contemporary art inspired by Cole at the Thomas National Historic Site. “That’s a critical thing. It wasn’t about the past, it was about the present. The Oxbow, his greatest work, is really about: Where will the country go? What is the direction of this nation? Is it going to live in harmony with the land and not despoil it?”
And even though Cole’s motives differed from those of the Hudson River School painters whose majestic landscapes glorified America’s spoils, his example did set artists—like his students
and
—on a path toward making one of the country’s most defining bodies of work.
and
—on a path toward making one of the country’s most defining bodies of work.
“He gives American painters a license to move beyond fantastic scenes of traditional subjects from European history and to really concentrate on the immediate landscape with a scientific accuracy,” says Rosenfeld. He also gave them permission to work at an outsized scale. “The kinds of paintings Church does and Bierstadt does—these massive paintings, that is all made possible by Cole.”
While Cole wasn’t entirely progressive—he remained silent on Jackson’s removal of Native Americans from the northeast, for instance—he nonetheless stands out as a proto-environmentalist. And nearly 200 years later, as our environment is more in peril than ever before, his landscapes feel uncannily relevant.
Meredith Mendelsohn